Payers are who pays for appointments: EPS (Colombian health plans), insurers, agreements. Their list is what’s suggested when typing the patient’s payer while booking, and each payer also decides whether Arbol’s WhatsApp assistant can book its patients. Load it when you start and update it when your organization signs or ends an agreement.
Before you start
- You need the Administración role. The other roles use the list when booking.
- In Configuración, the list appears under the name your organization gave the field in Datos al agendar, for example EPS or Aseguradora (insurer). It starts as Entidad / EPS (see Set up booking details).
- If the payer is set to No se pide (not asked) in Datos al agendar, the list isn’t used when booking.
Add a payer
-
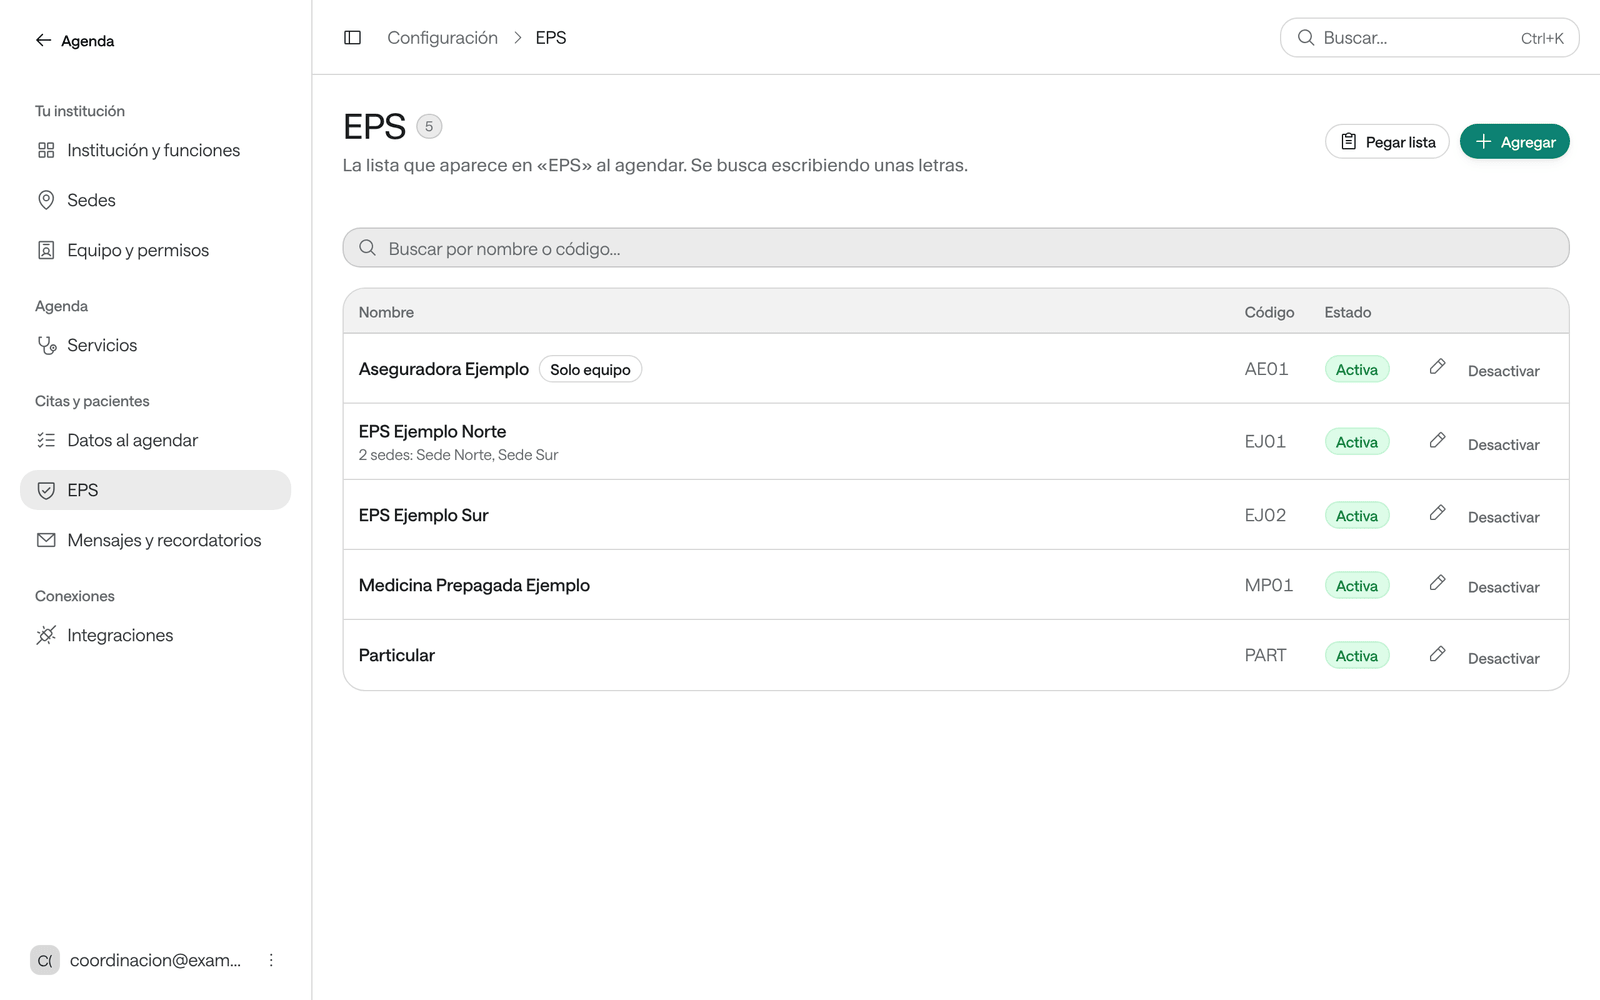
In Configuración, click Entidades (payers), or the name your organization gave it.
-
Click Agregar (add).
-
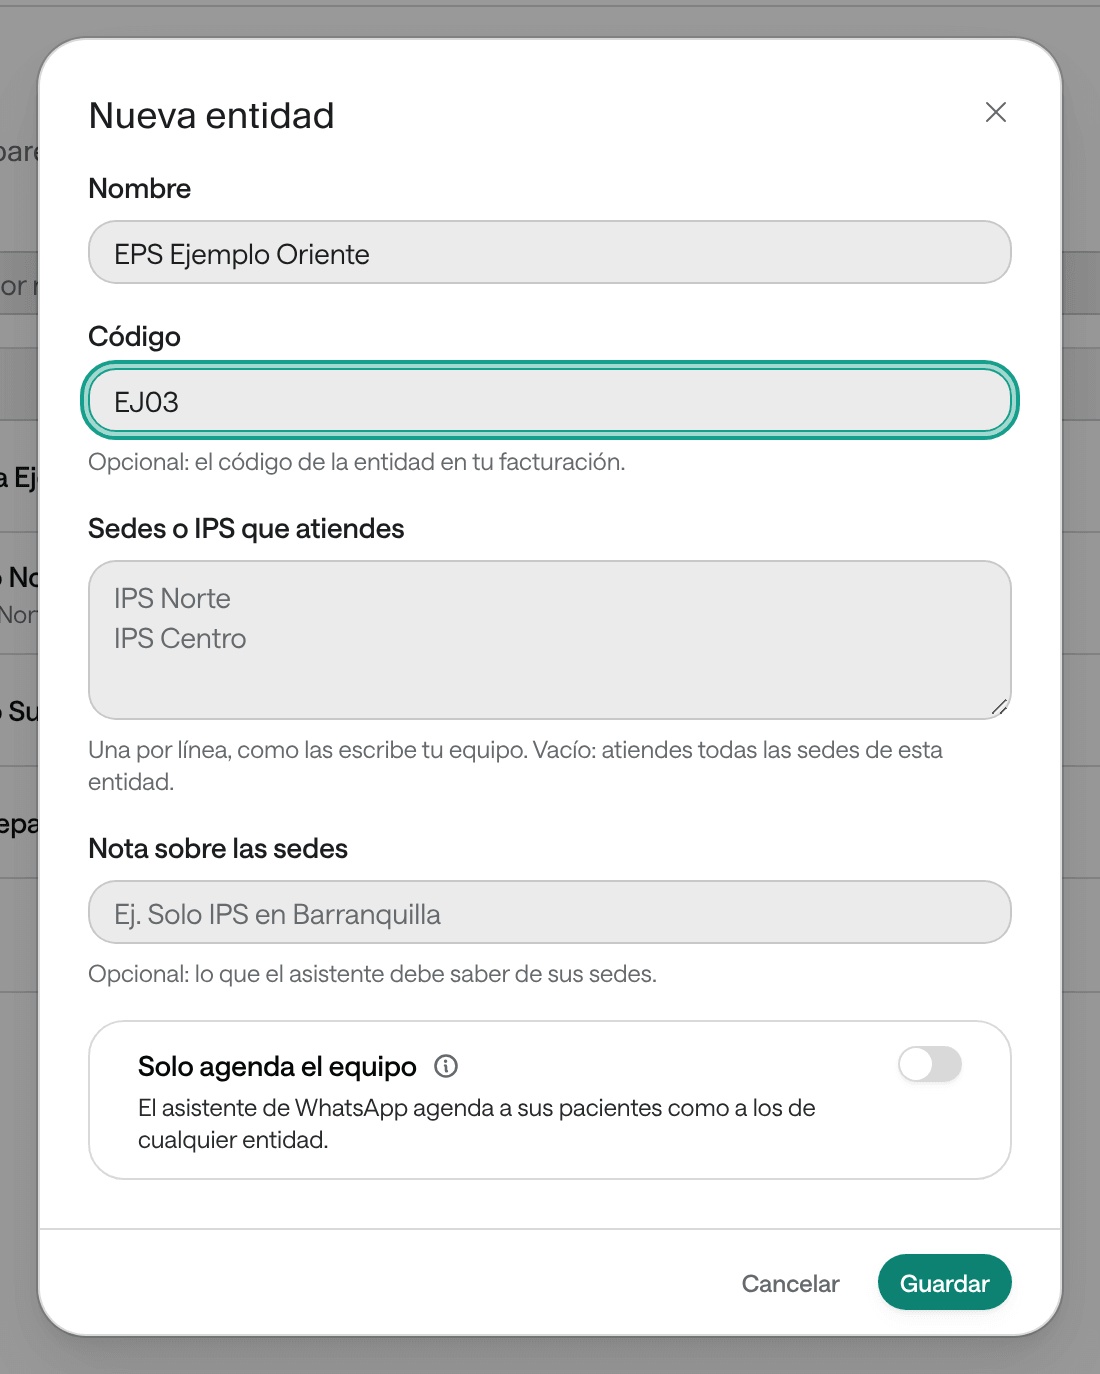
Type the Nombre (name), the way your team writes it, for example «EPS Ejemplo Norte».
-
If you like, type the payer’s Código (code) in your billing.
-
If your organization only serves patients from some of that payer’s sites or IPS (care providers), type them in Sedes o IPS que atiendes (sites or IPS you serve), one per line. Empty means you serve all of them. In Nota sobre las sedes (note about the sites) you can add what the WhatsApp assistant should know, for example «Solo IPS en Barranquilla» (only IPS in Barranquilla).
-
If only your team books its patients, turn on Solo agenda el equipo (only the team books) (see below).
-
Click Guardar (save).
What you see when you’re done
At the top it says La entidad se guardó. (the payer was saved). The payer appears in the list as Activa (active), with its code, its sites and, if you marked it, Solo equipo (team only). From then on it’s suggested when booking: typing a few letters in the payer field is enough.
Load many payers at once
-
Click Pegar lista (paste list).
-
In Entidades, paste the names, one per line, as in a spreadsheet column.
-
Click Agregar. The button says how many it will add.
Those already on the list are skipped, and up to 500 fit at a time. Agenda says how many it added, or Todas ya estaban en la lista. (they were all already on the list). Then edit the ones that need a code, sites or Solo agenda el equipo.
What each setting changes
| Setting | What it changes |
|---|---|
| Nombre | What’s suggested when booking. Each appointment keeps the name it was booked with. |
| Código | A reference for your billing. It also lets you find the payer in this list. |
| Sedes o IPS que atiendes and Nota sobre las sedes | Tell Arbol’s WhatsApp assistant which of that payer’s sites your organization serves. The assistant checks it when booking. |
| Solo agenda el equipo | The WhatsApp assistant doesn’t book or reschedule its patients. Your team can. |
| Desactivar (deactivate) | The payer is no longer suggested when booking, and Solo agenda el equipo stops applying. Appointments that already have it don’t change. |
When only the team books a payer
Use it for payers with few patients, where you first need to talk to the professional before giving the appointment.
The patient asks for an appointment
On WhatsApp, with a payer marked Solo agenda el equipo.The assistant writes them down
On the waiting list, with Coordinar con el médico.Your team coordinates and books
Talks to the professional and gives the appointment.
The person lands on the Lista de espera (waiting list) with the reason Coordinar con el médico (coordinate with the doctor) and the link to the conversation. If your organization turned on the waiting list notice, your team also gets an email (see Set up messages and reminders). How to book them from the list is in Use the waiting list.
The rule applies when the appointment’s payer has the same name as on this list and the payer is Activa.
Edit or deactivate a payer
- To change its details, click the pencil on its row. Editar entidad (edit payer) opens; make your changes and click Guardar.
- To stop suggesting it, click Desactivar. To see it again, click Ver inactivas (show inactive) and then Activar (activate).
- To find one, type in Buscar por nombre o código… (search by name or code).
Common problems
I don't see Entidades in Configuración
It may have another name: the one your organization gave it in Datos al agendar, such as EPS or Aseguradora. If you don’t see Configuración at all, your role isn’t Administración.
What to do: look for the section in the Citas y pacientes (appointments and patients) block of Configuración.
A payer doesn't appear when booking
The payer is inactive, or it was written differently.
What to do: click Ver inactivas and activate it, or search for part of its name or its code. When booking you can also type a payer that isn’t on the list.
The WhatsApp assistant booked a patient of a payer only the team books
The rule only applies if the appointment’s payer has the same name as on the list and is Activa, with Solo agenda el equipo on.
What to do: check the payer on the list and the name saved on the appointment. If you need to coordinate with the professional, do so and, if anything changes, reschedule or cancel the appointment.
It says «Caben hasta 100 sedes por entidad» or «Cada sede admite hasta 120 caracteres»
The list of sites is too long (“up to 100 sites per payer”), or a site has a very long name (“each site takes up to 120 characters”).
What to do: shorten the list or the name. Whatever doesn’t fit, explain it in Nota sobre las sedes.