Do this when you need to see a patient’s appointments or details, or when someone new arrives. Agenda keeps one record per patient with their details, appointments, notes and files.
Before you start
- Every Agenda role can search for patients and open their record.
- To register a patient you need the Recepción, Profesional or Administración role.
Find a patient
-
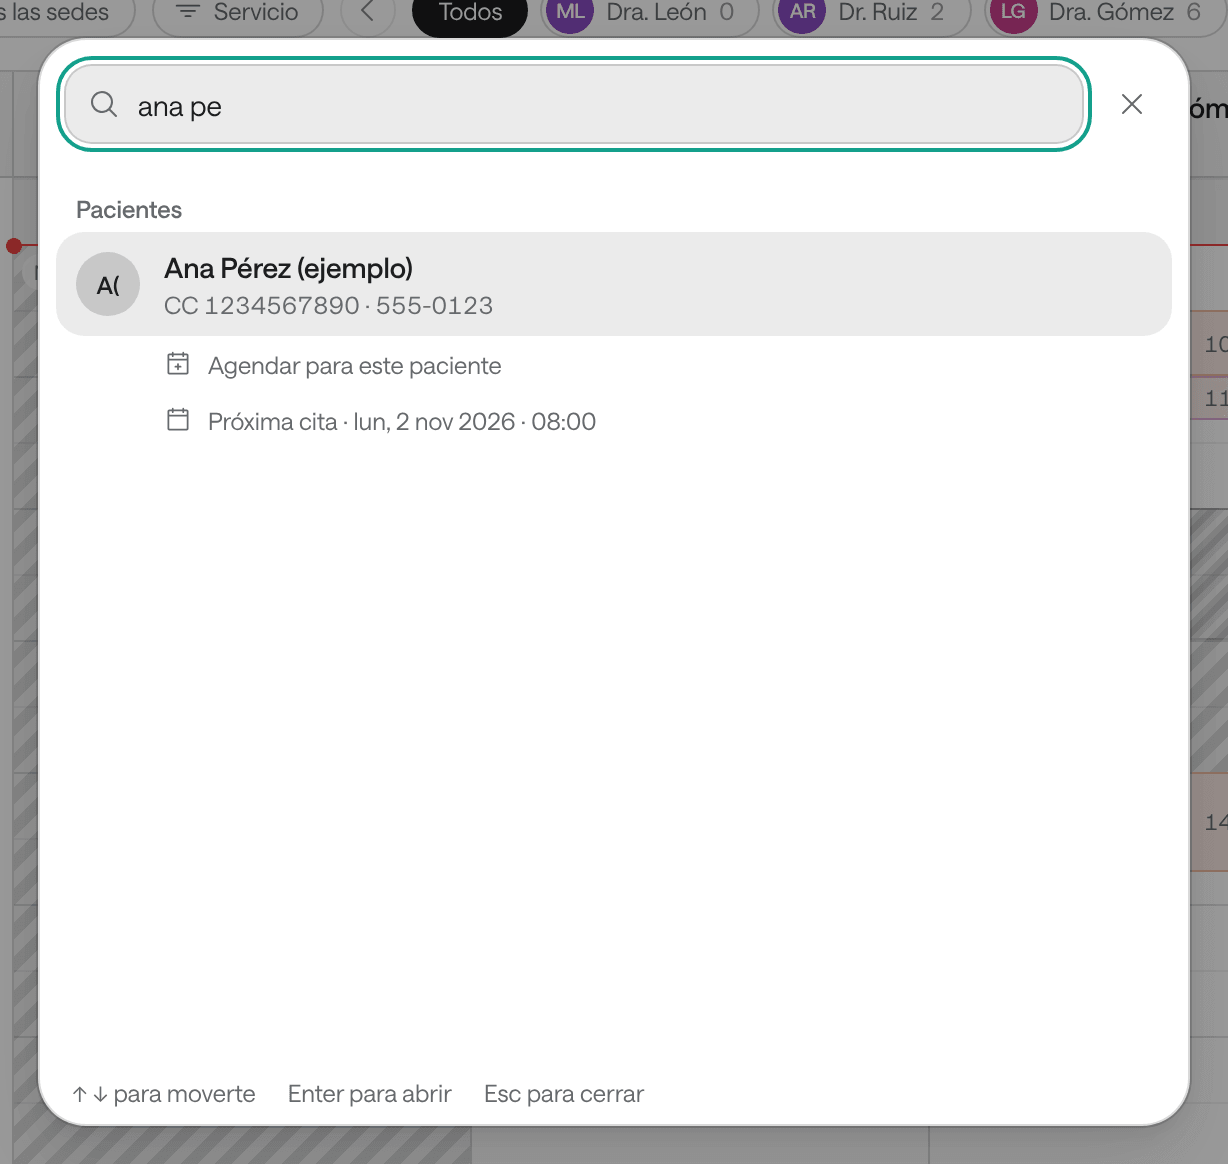
Press Ctrl+K (⌘K on a Mac) from any page, or click Buscar… at the top (on the agenda, the magnifying glass).
-
Type at least two letters of the name, or the document or phone number.
-
Pick the patient with the arrows and Enter, or with a click, to open their record. Under their name you can also choose Agendar para este paciente (book for this patient) or see their Próxima cita (next appointment).
Before you type anything, search shows your Pacientes recientes (recent patients).
From the Pacientes page
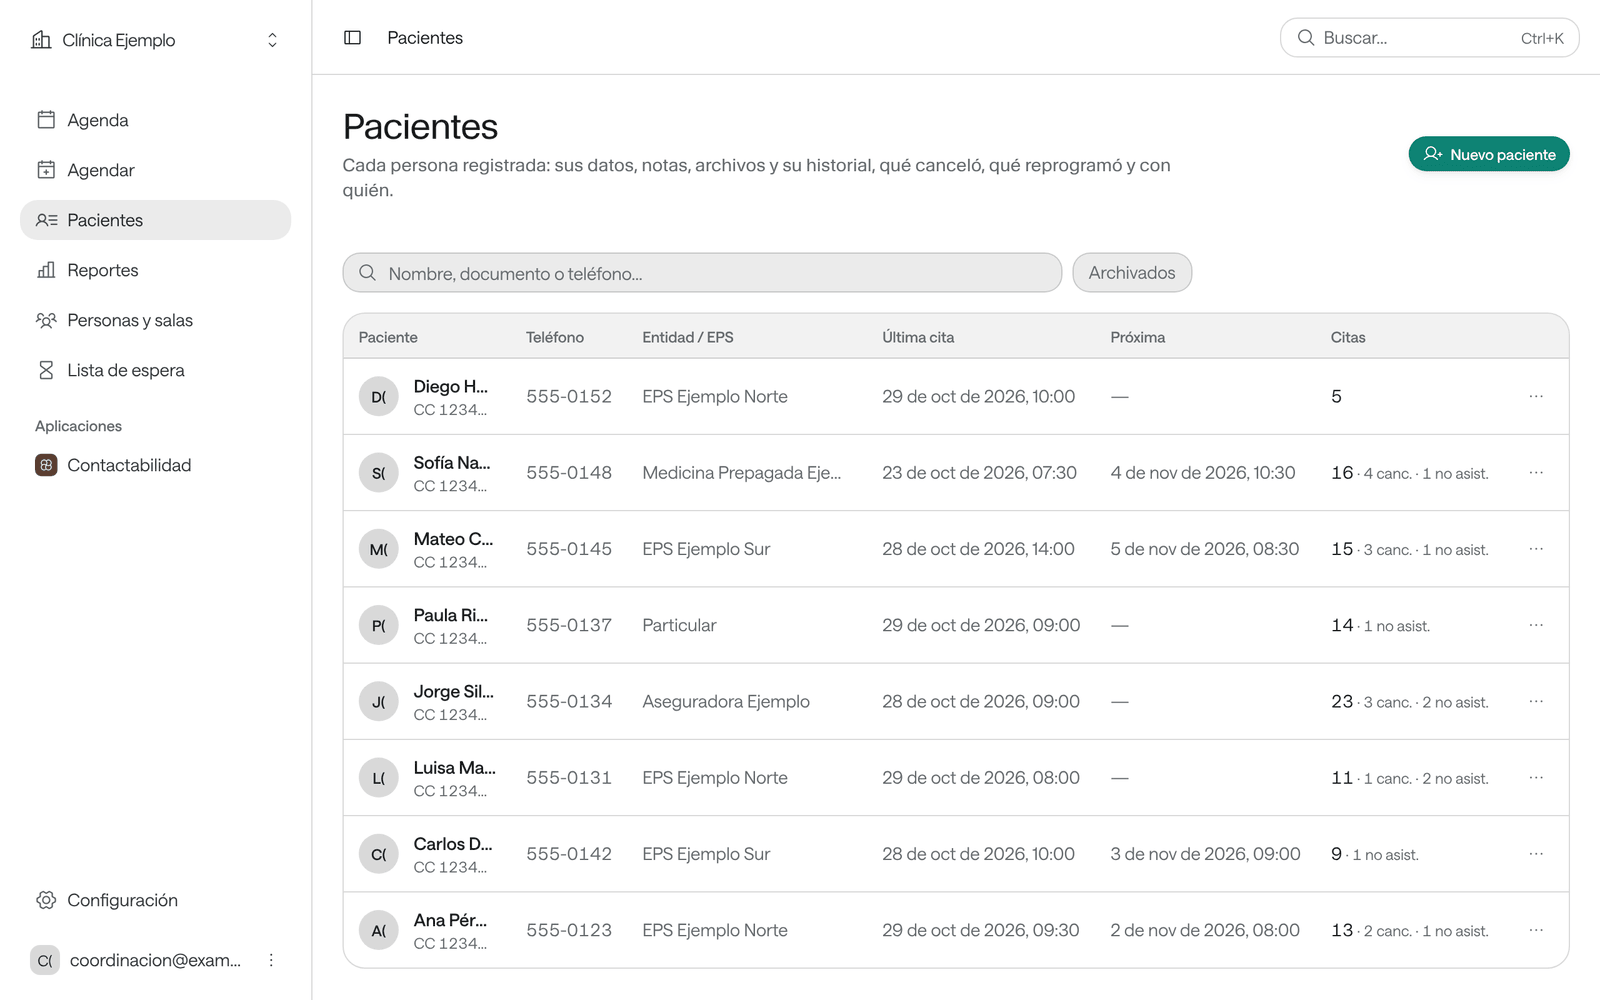
In the menu, click Pacientes. Type in Nombre, documento o teléfono… to filter the list. Each row shows the phone number, the Última cita (last appointment), the Próxima (next) and how many Citas (appointments) they have. Each row’s ⋯ button has Ver ficha (view record), Agendar para este paciente, Llamar (call), WhatsApp and Archivar paciente (archive patient).
Register a new patient
If the patient is asking for an appointment, you don’t need to register them first: when you book the appointment with their name and document, Agenda creates their record. Register them this way when you want to save them without an appointment.
-
In Pacientes, click Nuevo paciente (new patient). You can also do it from search: if nobody matches what you typed, choose Nuevo paciente.
-
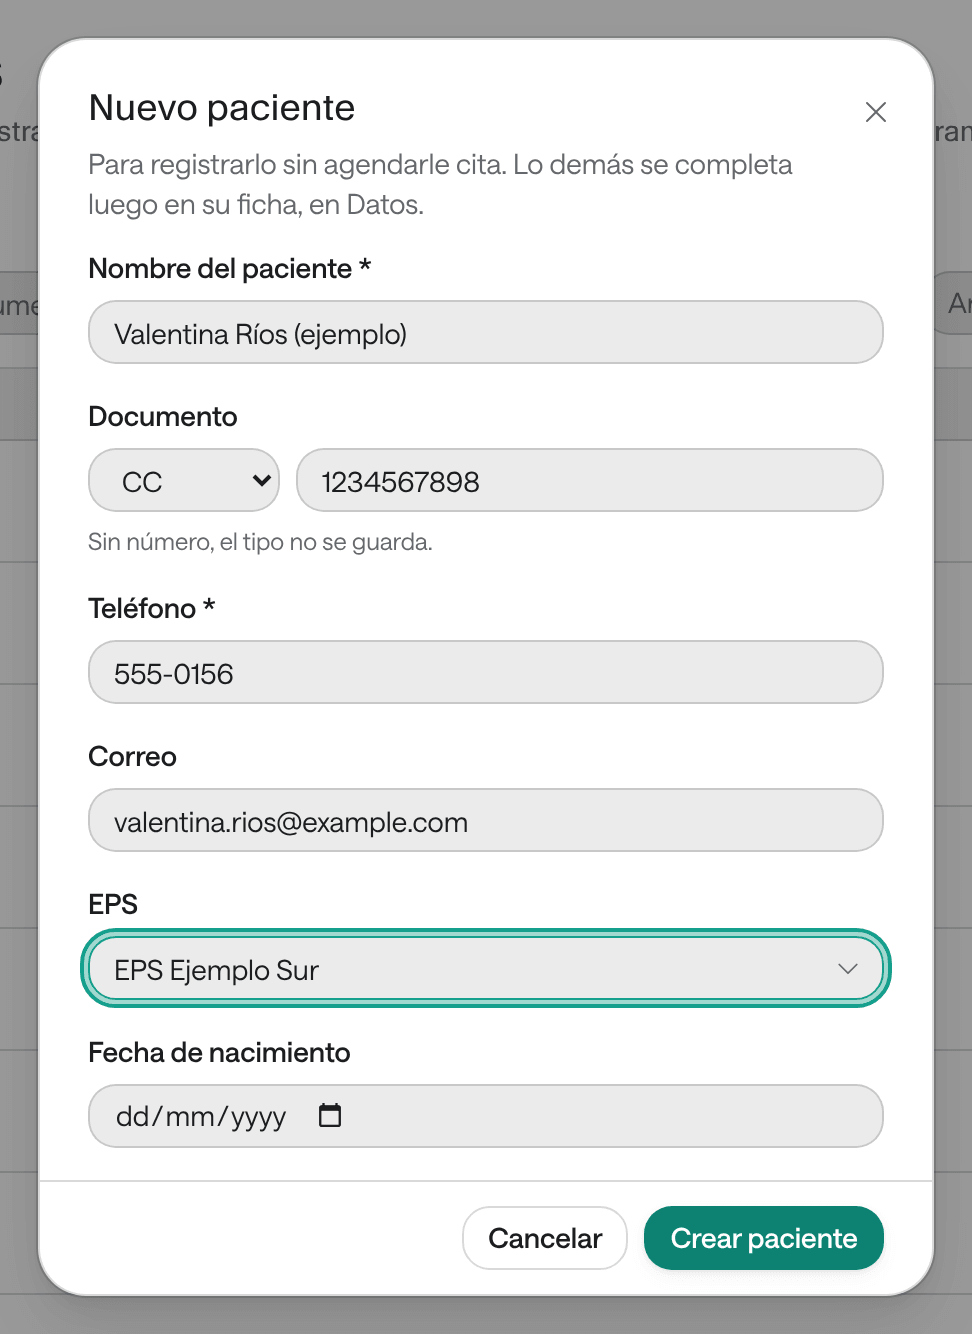
Type the Nombre del paciente (patient’s name) and, if you have them, the Documento (pick the type and type the number), Teléfono, Correo (email), Entidad / EPS (payer) and Fecha de nacimiento (date of birth). Fields marked * are required in your organization.
-
Click Crear paciente (create patient).
What you see when you’re done
The new patient’s record opens, with the tabs Citas (appointments), Notas (notes), Archivos (files, if your organization uses documents) and Datos (details). From there you can complete their details or click Agendar cita.
Common problems
It says «Ya existe un paciente con ese documento» (a patient with that document already exists). That document belongs to a registered patient. Click Abrir su ficha (open their record) to see them; don’t create a duplicate.
The patient doesn’t show up. Check the spelling of the name, or try the document or phone number. If someone archived them, they don’t appear in the list or in search: in Pacientes, click Archivados (archived) to see and restore them (see Update a patient’s record).
It says «Escribe al menos dos letras» (type at least two letters). The list searches from two letters.
You don’t see the Nuevo paciente button. Your role is Consulta, which is view only.