Do this when one of your organization’s systems, such as your CRM or your health records system, is going to use Arbol on its own. Usually whoever is building that connection asks you for it. An API key is the key that system uses to get into Arbol, with the permissions you choose.
Before you start
- To create, rotate and delete API keys you need Account’s Administration role, the Administration role in Raíz, Agenda or Ámbar, or to be the Owner. With Account’s Viewer role you can see them without changing them.
- A key can only carry permissions you hold.
- Ask whoever will use it what their system needs: in which applications, and whether it only reads information or also changes it. Give it just that.
- The key is shown only once. Decide beforehand where it will be kept: ideally a secret manager, never an email or a chat.
Steps
-
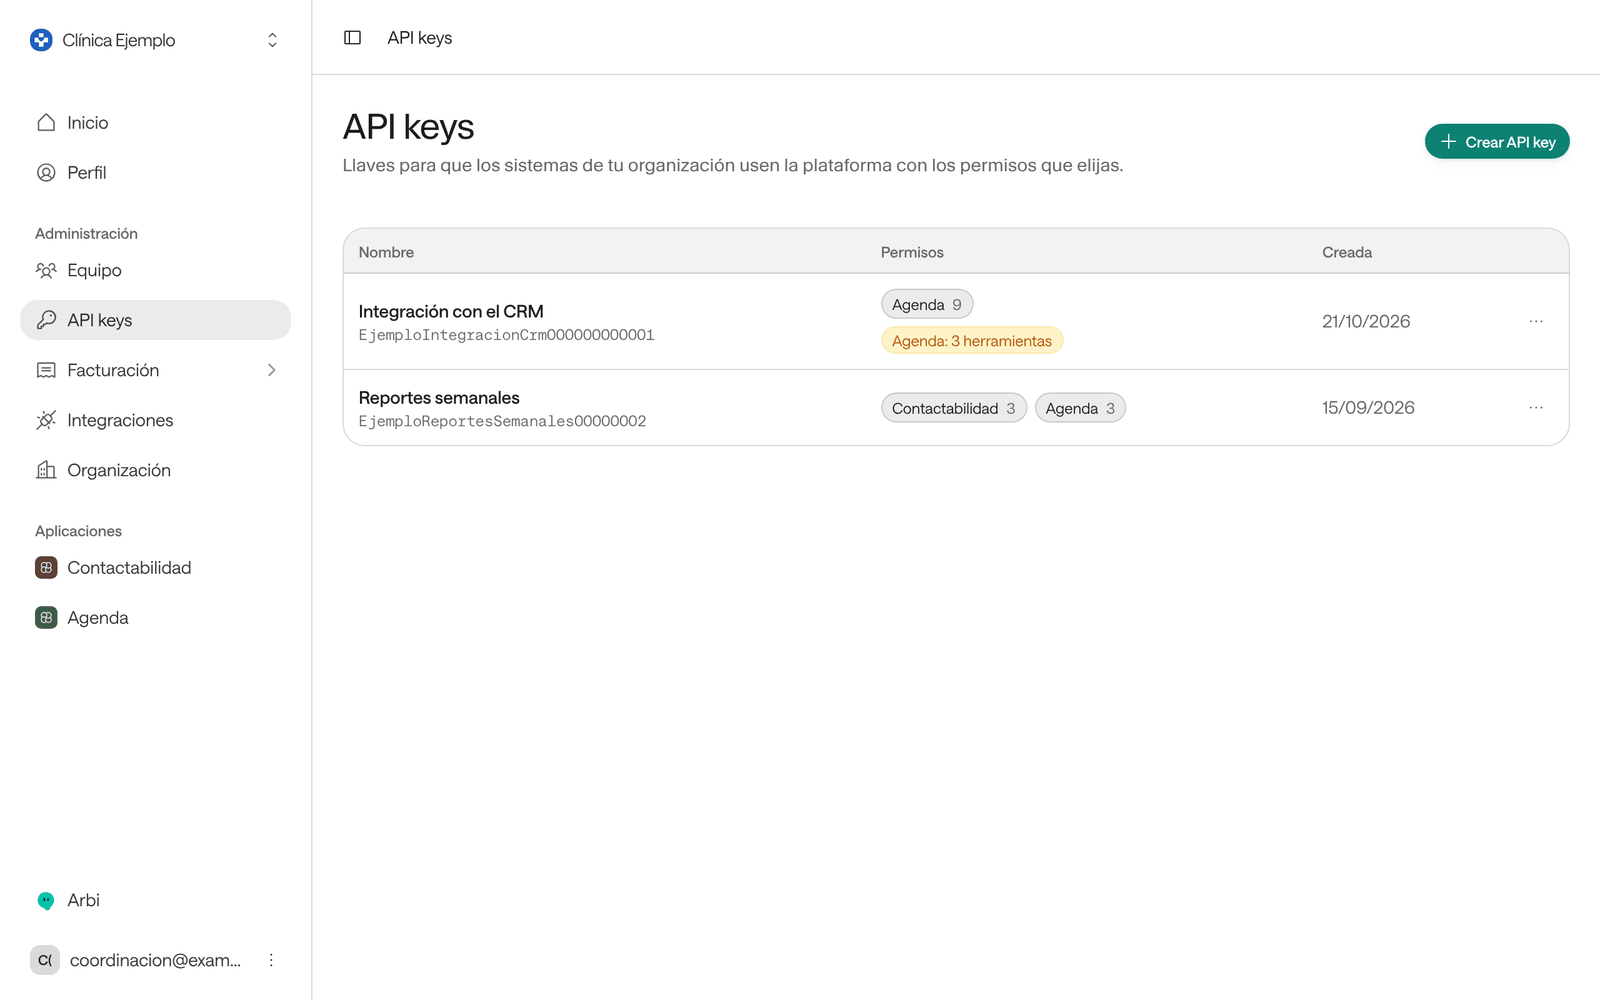
In the menu, under Administration, click API keys.
-
Click Create API key. If there are none yet, the button is called Create the first one.
-
In Name, type what will use it, so you can recognize it later. For example: “CRM integration”. Up to 60 characters.
-
Under Permissions, choose All for each group or, if the group has both reading and changing permissions, Read only. None appears once you’ve chosen something in the group and clears it. To choose permission by permission, expand the group. At the top, Choose everything (N) selects all the ones you can give and, afterwards, Clear all clears them. There are groups per application, per integration and for Account.
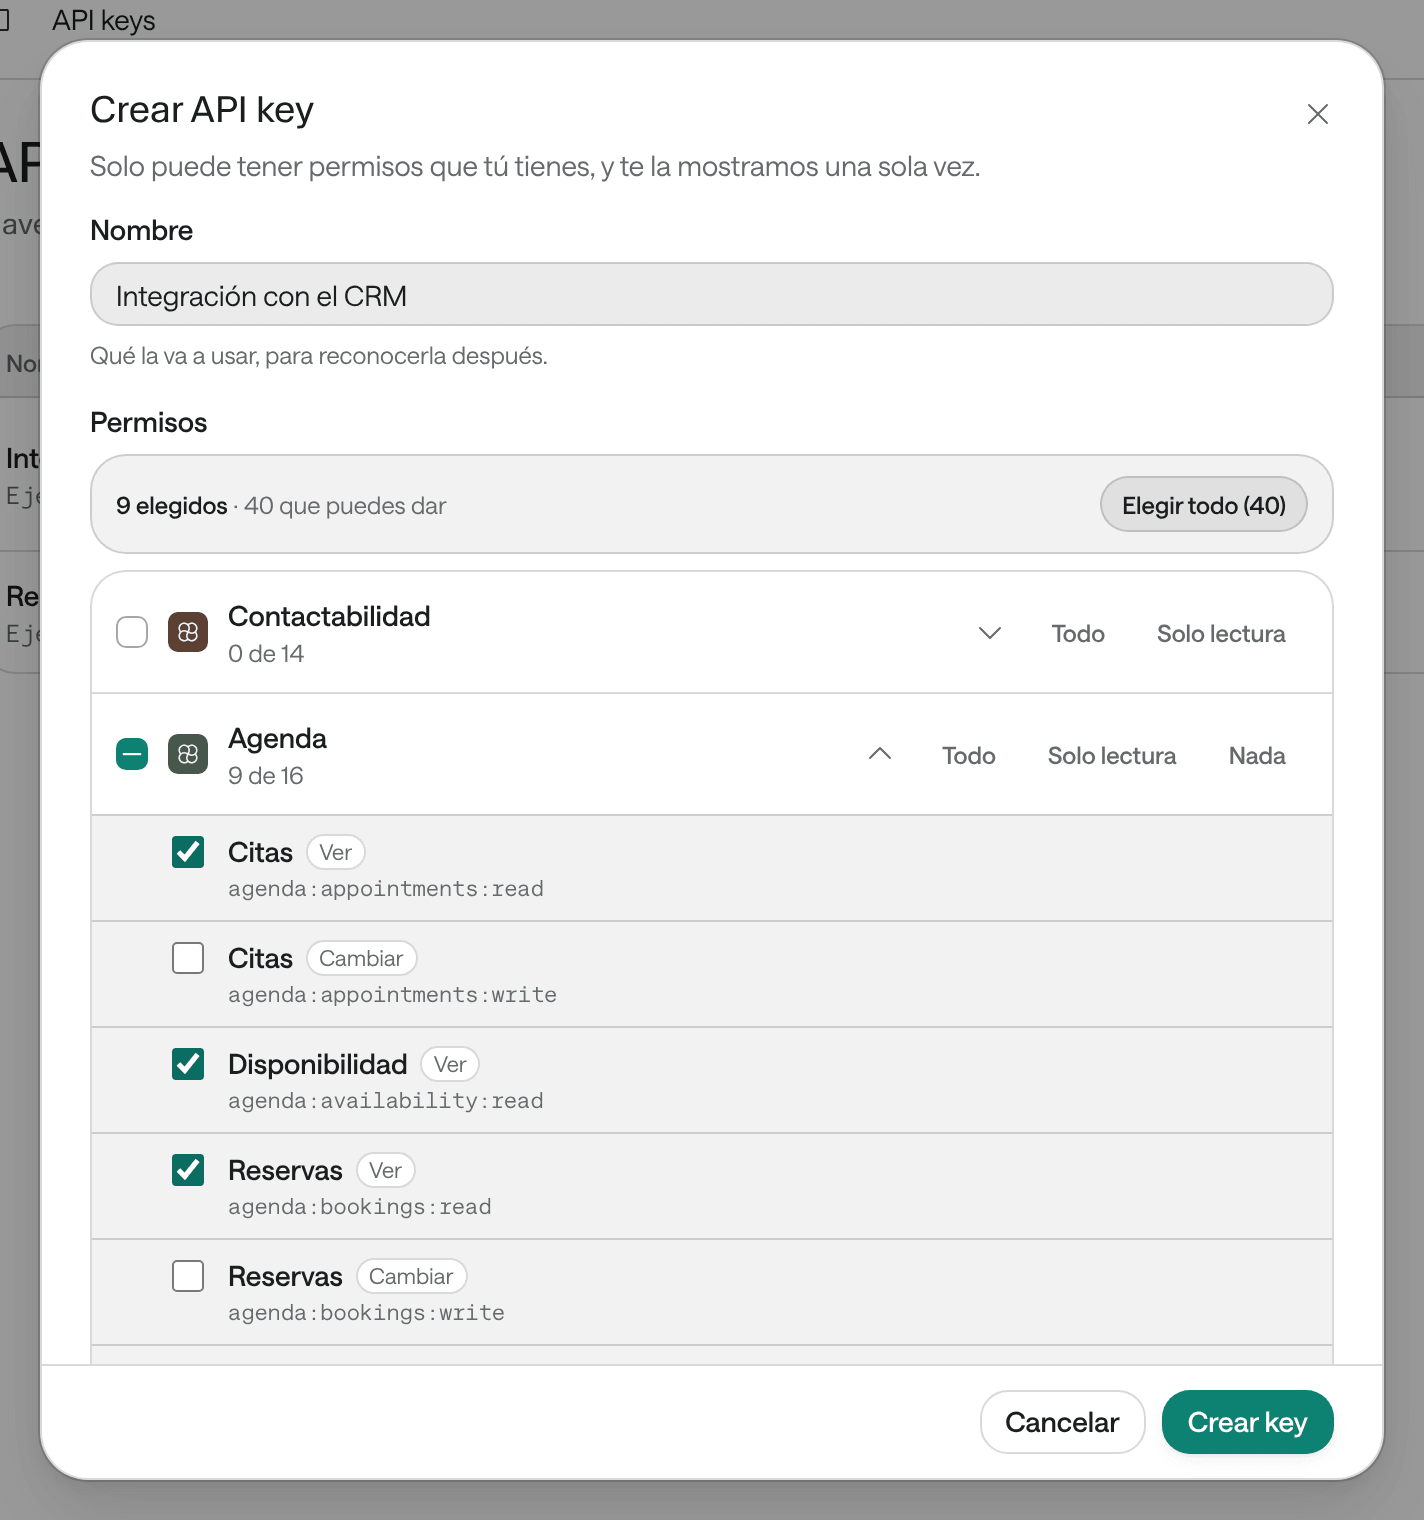
Permissions you don’t hold are listed but can’t be chosen: “You don’t hold it, so your key can’t either.”
-
If the permissions you chose reach an integration your organization has, Connections and tools appears. There you can limit the key inside that integration:
- Under the integration’s connections, choose Only some and tick the connections it may use.
- Under the integration’s tools, choose Only some and tick the tools it may use.
Whatever stays on All is decided by its permissions. What connections and tools are is in See the integrations.
-
Under Expiration, choose the date and time the key stops working. By default it expires in seven days.
-
Click Create key.
-
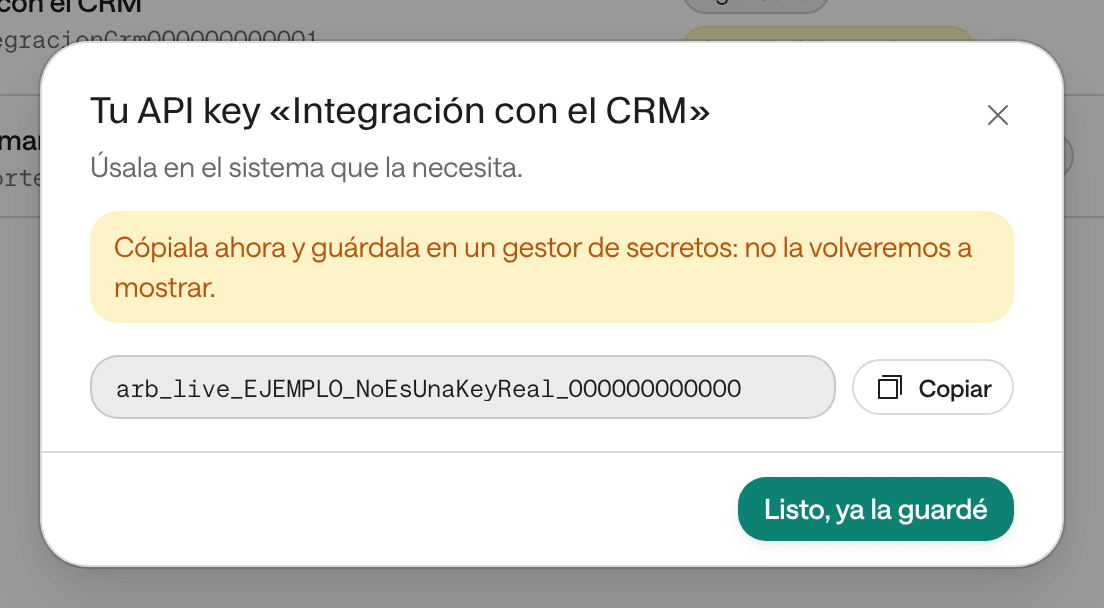
In the Your API key “…” window, click Copy (it says Copied once copied) and keep it where you decided. Then click Done, I saved it.
What you see when you’re done
The key appears in the list with its Name and its identifier underneath, its Permissions per application and the date it was Created. If you limited it, you also see a label such as “SURA: 1 connection · 3 tools”. The key itself is never shown again.
Rotate a key
Rotate a key if you think someone else may have seen it, or when your organization changes its keys on a schedule.
-
In API keys, open the ⋯ menu in the key’s row and choose Rotate.
-
Confirm with Rotate.
-
In the The new key for “…” window, copy it with Copy, keep it, and click Done, I saved it.
-
Put the new key in the system that uses it.
The new key has the same permissions. The previous one stops working within about two minutes, so update the system right away.
Delete a key
Delete a key when the system that used it no longer needs it.
-
In API keys, open the ⋯ menu in the key’s row and choose Delete.
-
Confirm with Delete.
You see the message “You deleted “…”. It stops working within about two minutes.” It can’t be recovered: systems that use it lose access.
If a key was exposed
If a key was pasted into an email, a chat, a document or a code repository, treat it as compromised even if you think nobody saw it:
- Rotate it right away if the system still needs it, and put the new one in the system. The exposed one stops working within about two minutes.
- Delete it if it’s no longer used.
- Delete the message or file where it ended up and tell whoever handles security at your organization.
One key for everything
A single key with Choose everything, shared by several systems and kept in a chat.
One key per system, with just enough
One key per system, named after that system, with only the permissions it uses and kept in a secrets manager.
Common problems
- I lost the key or didn’t copy it. It can’t be shown again. Rotate it: you get a new one with the same permissions.
- I need to change a key’s permissions. A key’s permissions can’t be edited. Create a new key with the right permissions, put it in the system and delete the old one.
- “An API key can’t carry permissions you don’t hold.” Choose only permissions you hold, or ask someone who holds those permissions for the key.
- “Choose at least one, or go back to “All”.” You chose Only some without ticking any.
- I don’t see the Create API key button or each key’s menu. Your role only lets you see them.
- “Enter a name.” or “Use at most 60 characters.” The Name is required and has up to 60 characters.
- “That API key no longer exists. Refresh the page.” Someone else deleted or rotated it in the meantime. Reload the page.
For developers
How to send an API key with each call, what permissions do and which other credentials exist is in Authentication.